Create. Print. Scan. Repeat.
Receiving your product samples is like being a kid on Christmas morning.
Except you're an adult. And the samples aren't really yours. And, if you're handwriting labels instead of printing barcodes, you have a lot of work ahead of you.
We can't do much about your age or whether you get to keep product samples. But, we can help you enjoy your first look at your product samples without dreading hours of painstaking handwriting.
NuORDER users are creating and printing their own barcode labels, sticking them on their product samples and moving on with their busy lives.
If any of the following scenarios sound familiar, this blog is for you:
- You realize - after it's too late - there are misspellings and/or numeral mistakes on handwritten sample labels
- You've gone through the painstaking process of handwriting your labels, only to have the product samples switched out
- Your product labels fall off and must be rewritten
NuORDER users are creating and printing their own barcode labels, sticking them on their product samples and moving on with their busy lives.
Handwritten label headache relief
To help you avoid these unneeded headaches, we put together a quick outline on how to use NuORDER to create and print barcode labels. We also show you how to reprint your barcode labels in just one click (labels are inevitably lost), as well as how to pair your scanners and iPads and how to troubleshoot.
Barcode label content
Creating barcode labels can be done through NuORDER quickly and easily.
First, choose the information you want to appear on the barcode label, such as the product name, style, color, etc. NuORDER allows you to include a lot of information, and we want to ensure you know how to take advantage of it.
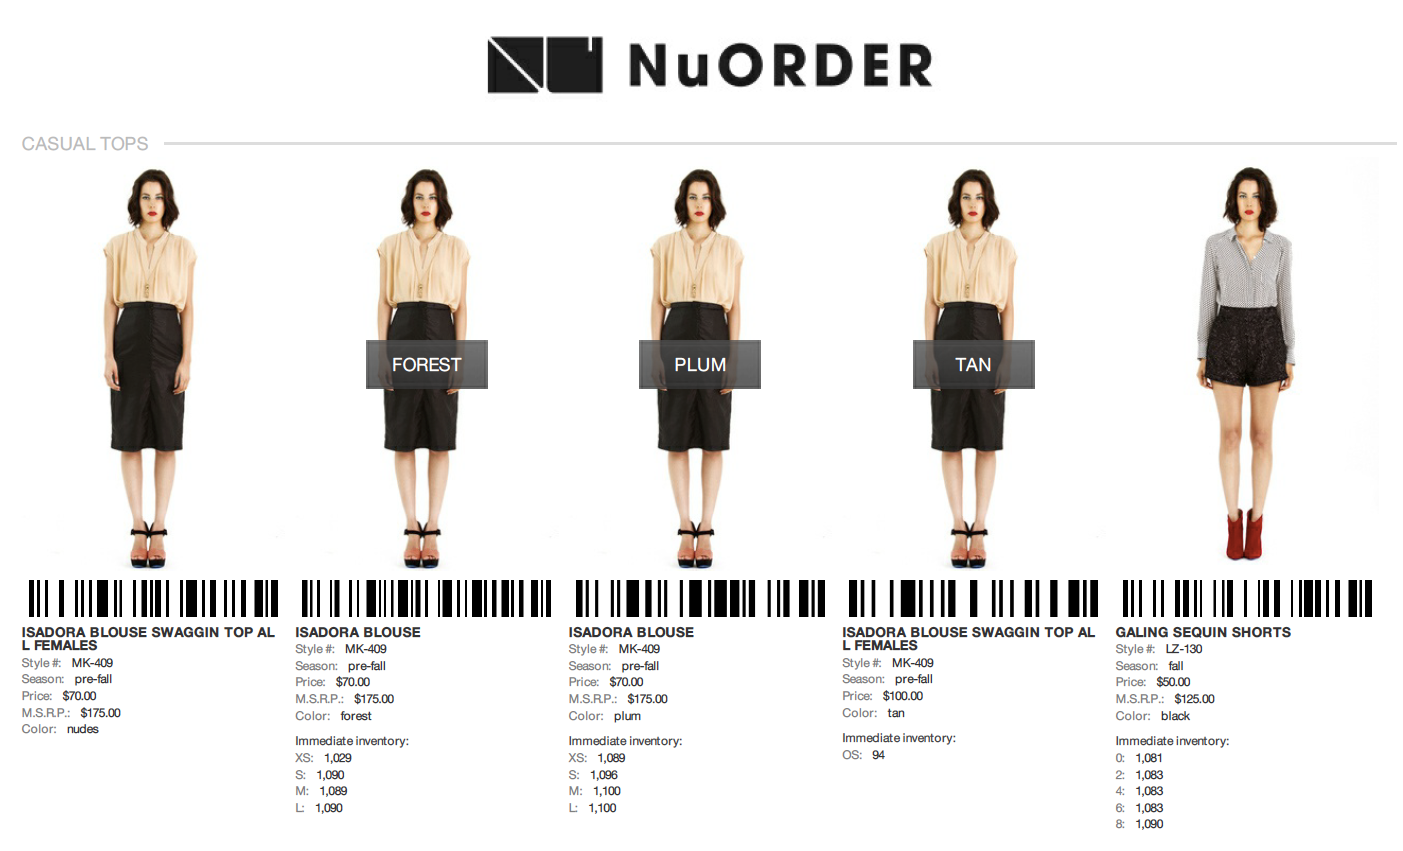
To set up your barcodes, go to Admin, then click Barcode Management. There are three fields (see image below) that will populate your barcode label (all info comes directly from your product data):
- Barcode title
- Barcode subtitle
- Barcode field
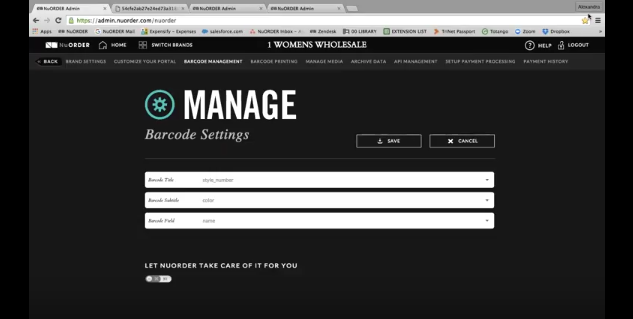 Multiple pieces of info can be included in each of the three columns to be included on your barcode sticker
Note that you can combine multiple pieces of info into each of the three columns. You can also include special information from your product data. For example, if you want to include the MSRP of items, it's easy to do.
Do you have your own barcodes?
Using your own barcodes is no problem — as long as your UPCs live in your product data, you can use your barcodes, our barcodes or both. Your iPad will recognize both barcodes when scanned.
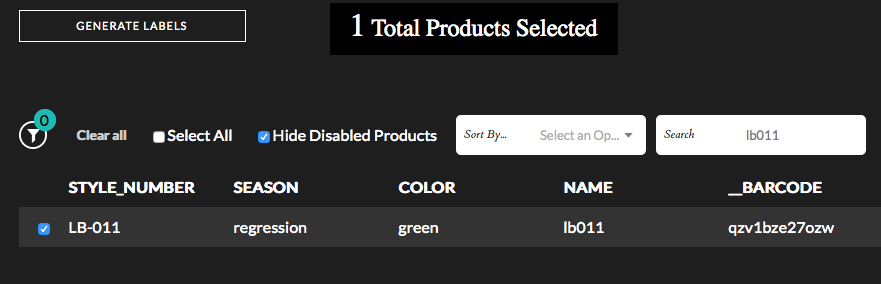
A trick that some brands are using successfully to save time is filtering by Availability. This makes it even easier to match your barcodes with their specific products. To do this, simply click on the Filter icon (it's under Generate Labels – see image below) and check off your preferred Availability in the pop-up menu that appears on the left.
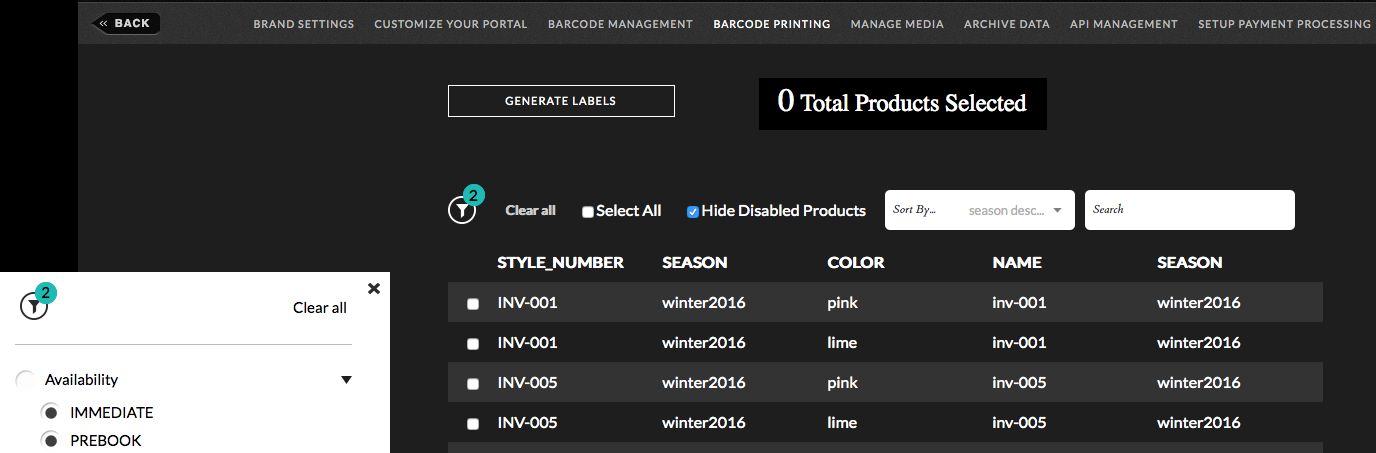 Filter by Availability to easily match your barcode stickers to the corresponding items
Barcode label printing
You've created your labels, so let's get printing.
First, go to Admin and look for the Barcode Printing tab at the top of the screen (Image 2). You can specify which product barcodes you want to print by choosing Select All, Sort, Search or you can Filter by Availability, Season, Warehouse, etc.
Next, simply click Generate Labels. Check your email for the pdf document and print. We suggest printing on Avery Label template #5155 paper.
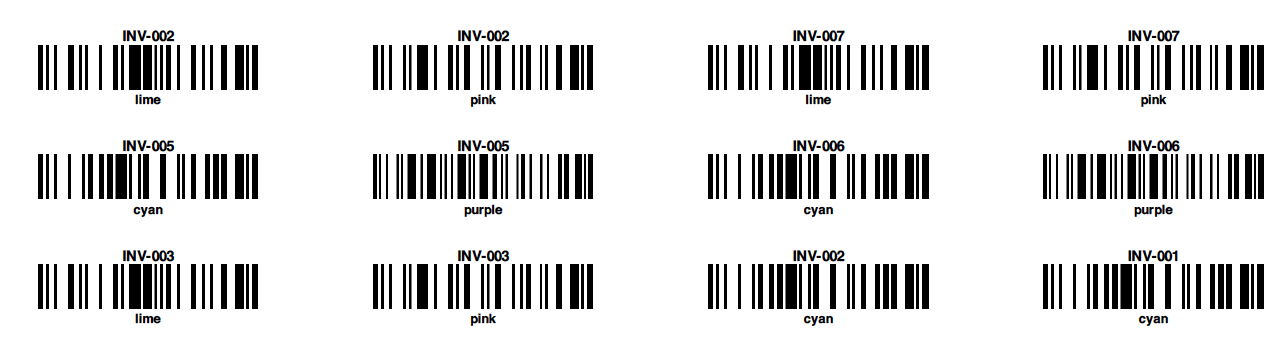 Your barcodes will be emailed to you as a PDF – ready to print
Linesheets with barcodes
Continuing our mission of making your life easier, you can also include barcodes with your linesheets. It's ridiculously easy.
First, go to Admin, then choose Manage Linesheets and click Create Linesheet. Choose a Standard Template and toggle the Barcode option to On.
The image below is an example of the resulting linesheet.
 Example of a linesheet with the Barcode option toggled to On
Lost labels and hang tags
In the process of transporting samples to and fro, labels and hang tags fall off and get lost along the way. Fret not ye NuORDER user, for there is a quick solution:
- Go to Admin, then Barcode Printing
- Based on what you know about the product, use the Search bar
- Click Generate Labels and print the PDF from your email
 Lost tag? Search. Reprint. Done.
Take the test
If you're off to a tradeshow or showroom environment, it's a good idea to test the iPads, scanners and barcodes you’ll be using. We recommend you begin testing at least one week prior.
Pairing tips:
- Pair only one scanner to each iPad - mixing them can cause them to not pair properly
- Label the paired iPads/scanners to avoid mix-ups
Barcode test checklist
Ensure you're using the newest version of the NuORDER iPad app (available in the iTunes App Store). The newest version of the app will have a white background in the icon.
With your app updated, pair your scanner:
- Turn on your barcode scanner
- In your iPad Settings, go to Bluetooth and toggle it to On
- Under My Devices, connect with your scanner
- Open the NuORDER app and log in
- In the top right corner of your iPad, there should be a barcode icon. Tap there for Scan mode
- If the keyboard appears on your iPad, your scanner is not paired properly
- If you scan a product barcode and it's not found, the issue is usually that the product and/or barcode has not been loaded into NuORDER
Troubleshooting
If your scanner is not working, follow these steps:
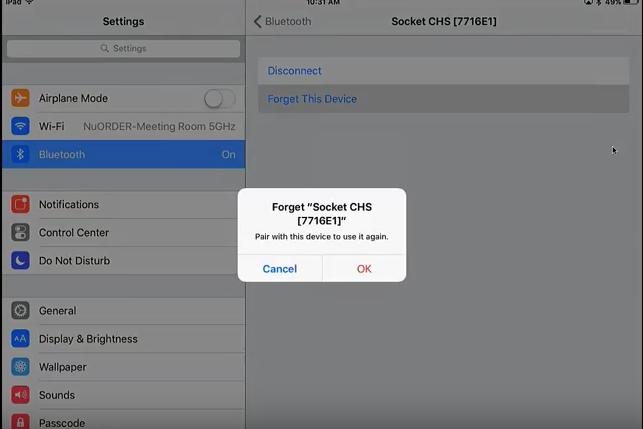
- Go back to iPad Settings, then Bluetooth and find your scanner under My Devices
- Select the "i" icon
- Tap on Disconnect and Forget This Device
- Turn off your barcode scanner (if you're using our recommended scanner Socket Mobile 7Ci, hold down both buttons for 10 seconds to reset), and turn it back on
- Once your scanner is on and reset, turn Bluetooth to On and connect to your scanner
 If your scanner is not pairing, Disconnect, Forget, then Pair again
Handwriting product label dread be gone - receiving product samples just became fun again.
--
For a more visual walk-through, see the video below for a recording of our webinar Barcodes, Scanners and Zero Trade Show Trip Ups:
Share article
Get on the list
Wholesale tips and industry news you can’t miss, delivered weekly